How to Drill Into Concrete?
Drilling into concrete can seem like a daunting task, but with the right tools, techniques, and safety precautions, it’s entirely manageable. Whether you're installing fixtures, setting up shelves, or laying down pipes, drilling into concrete is a skill that can be essential for home improvement projects and construction work. In this article, we’ll walk you through the process of drilling into concrete step by step, ensuring a smooth, successful operation every time.
1. Choose the Right Tools
Before you begin drilling, selecting the right tools is crucial for a smooth and efficient process. Drilling into concrete requires more power and the right drill bit compared to drilling into wood or drywall. Here's what you'll need:
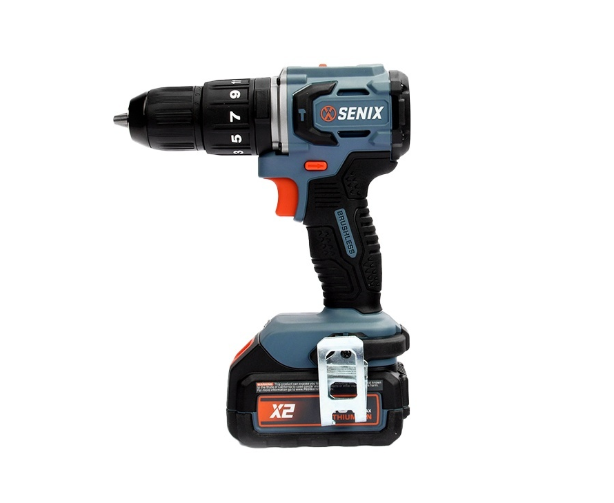
- Hammer Drill: A regular power drill won’t do the job when it comes to concrete. A hammer drill, which combines rotary drilling with a pounding motion, is specifically designed to break through hard surfaces like concrete. It’s essential for penetrating concrete efficiently without excessive effort.
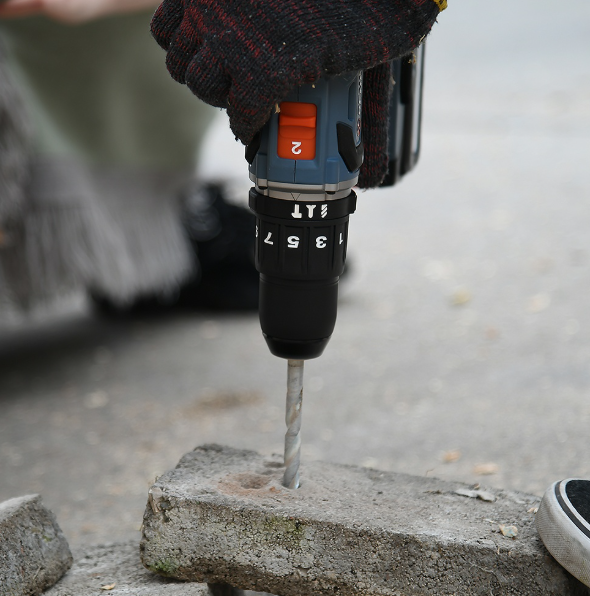
- Concrete Drill Bit: Concrete requires specialized drill bits. Use carbide-tipped masonry bits or diamond core drill bits for better performance and durability. These bits are designed to handle the hardness of concrete and ensure a clean hole.
Protective Gear: Safety is a top priority when drilling into concrete. Always wear safety glasses to protect your eyes from flying debris, a dust mask to avoid inhaling dust particles, and hearing protection to shield your ears from the loud noise of the hammer drill.
2. Mark the Spot and Prepare the Area
To ensure you drill in the right spot, you need to mark the location carefully. Here’s how:
- Measure and Mark: Use a pencil or chalk to mark where you want to drill. If you’re installing a fixture or hanging something, make sure your measurements are accurate to avoid mistakes.
- Protect the Surrounding Area: Concrete drilling can create a mess of dust and debris. Consider laying down a drop cloth or using painter’s tape around the drilling area to minimize cleanup.
Check for Utilities: Before drilling, make sure there are no hidden pipes, wires, or conduits behind the surface you plan to drill into. You can use a stud finder or a wall scanner to check for any obstructions.
3. Set Up the Hammer Drill
With your tools ready and the area prepared, it’s time to set up your hammer drill:
- Insert the Drill Bit: Insert the masonry or carbide-tipped drill bit into the hammer drill’s chuck. Tighten the chuck securely to prevent any slipping during drilling.
- Adjust the Hammer Function: Set the hammer drill to the hammering function (usually marked by a hammer icon). This setting combines rotational drilling with a pulsing force that helps break through the concrete.
Set the Speed: Most hammer drills allow you to adjust the speed. For drilling into concrete, start with a moderate speed setting to give the drill bit time to break through the material without overheating.
4. Start Drilling into Concrete
Now you’re ready to begin drilling:
- Position the Drill: Hold the hammer drill with both hands for better control and stability. Align the drill bit directly with the mark you made on the concrete surface. Apply light pressure as you begin drilling.
- Drill in Intervals: Don’t try to drill in one continuous motion. Pause every few seconds to allow the drill to cool down and to remove debris from the hole. This will also prevent the drill bit from binding or getting stuck.
Increase Pressure Gradually: As the drill bit starts making progress, you can apply a bit more pressure. However, let the drill do the work—forcing it too hard can damage the tool or the concrete surface.
5. Clean the Hole
Once you’ve drilled the required depth into the concrete, it’s time to clean up the hole:
- Remove Debris: Turn off the hammer drill and remove the drill bit. Use a vacuum or a small brush to clean out any dust and debris from the hole. This will ensure that any anchors or screws you insert will hold securely.
Check Depth: If you’re using the hole to insert anchors or screws, check the depth of the hole to make sure it’s deep enough. Use a depth gauge or a measuring tape to confirm the hole is at the right depth for your project.
6. Insert Anchors or Screws
Depending on your project, you may need to insert wall anchors or screws into the concrete:
- Wall Anchors: If you're using anchors, tap them gently into the hole with a hammer, ensuring they’re flush with the surface. Then, insert your screws or bolts to secure the fixture or object you’re attaching to the wall.
Screws: If you’re directly screwing into the concrete (without anchors), use a masonry screw that’s designed for concrete. A power screwdriver will help you drive the screw in firmly.
7. Final Safety and Cleanup Tips
Once you’ve completed your drilling, it’s important to clean up and ensure safety:
- Turn Off Equipment: Make sure the hammer drill is turned off and unplugged before you perform any further work or cleaning.
- Dispose of Debris: Sweep up the dust and dispose of it properly. You can use a dustpan or vacuum to collect concrete dust and avoid spreading it around the area.
Inspect Your Work: Double-check the holes and ensure everything is secure before attaching or installing anything onto the concrete surface.
Conclusion
Drilling into concrete doesn’t need to be difficult or overwhelming if you follow the right steps and use the proper tools. With the right hammer drill, masonry bit, and safety precautions, you can achieve precise, clean holes in concrete surfaces for all your DIY and professional projects. Remember to take your time, follow the tips outlined above, and always prioritize safety. Whether you're setting up shelves, installing pipes, or putting in fixtures, drilling into concrete is a skill that can serve you well in many projects!


 (5.0)
(5.0)


